Do you ever get those home DIY ideas and think I just have to? At the end of the day (unless you’re knocking down walls), if it doesn’t work, you can put it back the way it was, right?
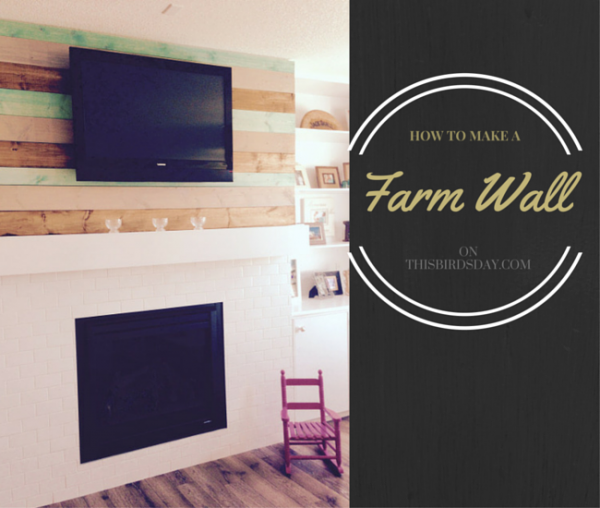
We live in a gorgeous house. It’s brand new and that works both for, and against it. I love character; creaks in the floor, wood paneling discovered in crazy places and the stories that seem to just live in the walls of older homes. I don’t have that with this house. BUT…whoa….no feeling sorry here I have a home that already has a personal memories attached, the plumbing is more than reliable and each and every area was designed by us. So that’s fun…but adding a little bit of character is fun too. That’s when I had the idea to make a farm wall.
This was an easy project and I’m excited to share it with you. The beauty of this project is how adjustable it is to fit all tastes. Here we go!!
Supplies
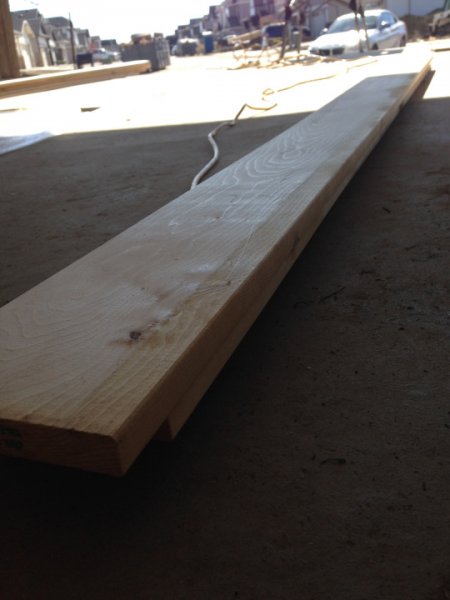
- 1 “ untreated wood. This can be found at any hardware store and comes in lots of lengths.
- Table Saw ( you can get the guys at your local hardware store to cut the pieces for you if you don’t have one)
- Tape Measure
- Wall Screws ( I like to use gold kind of roughed up screws for projects like this b/c they blend in better to the materials)
- Reloved vintage paint
- Rag
Directions
Start with a plan.
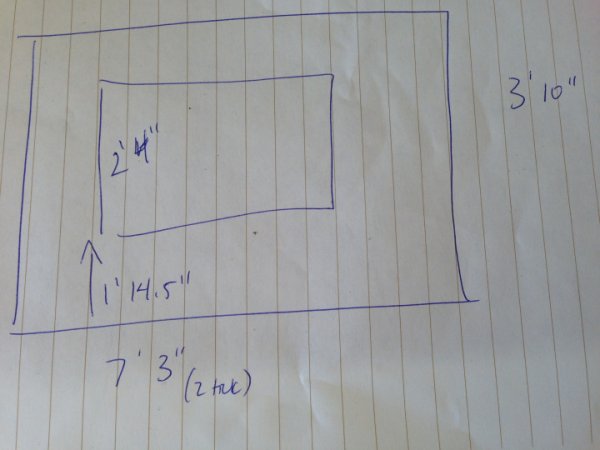
Yup, that’s as technical as I get. The measurements of a the section I wanted to fill with my farm wall.
Get your supplies
To get going…it’s important to note I’m often the the gal who just jumps in to a project. It’s a great quality that allows me to get things done…but often it means doing things twice. So this time, I took the advice of my more detailed-orientated husband and did this slower yet right.
We cut all the pieces to the length of our wall 7 feet 3 inches then hauled everything inside. We fastened piece by piece the wood to the wall with a single screw on each end. That was all that was needed b/c it is very light wood.

As we got up to the TV section we measure each piece…cut it and fastened it to the wall.

There you have it…hard part done! We removed each piece and labeled it with a number on the back so the re-assembly would be very easy.
Once everything was back in the garage the painting magic can happen. With my Reloved vintage paint ready it was time for fun. I LOVE PAINTING…it instantly transforms and brings things to life. I used Storm, Island and a gel stain that we are working to bring in to our line. (It was an oak colouring) 1/2 of cup of paint was put in a tupperware container and 2 cups of water was added. Then shake. With a Reloved Wax Cloth, I actually just wiped the paint on to the boards. EASY.


The when it was dry, just reassemble. And because you had everything lined up before…it just takes a few minutes to see the amazing results.

Get the paint you need for this project and everything on your “Reloved” list at www.reloved.com.
Reloved is Canada’s trendsetting vintage paint line for women with a desire to create, up cycle and work with quality. It was started from a desire to relove old furniture to create new pieces. Always searching for the best paint to get the best results, they’ve created Reloved, and they love sharing their passion with others.